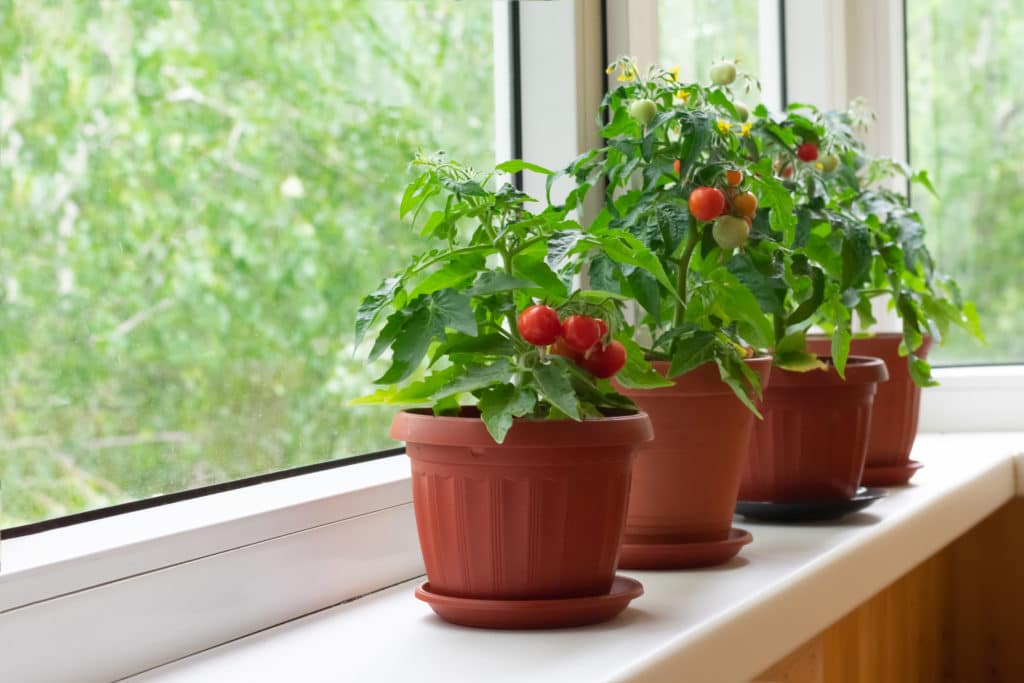
If you’re looking for an enjoyable summer gardening project, look no further than growing tomatoes in containers. While tomato plants may be a little more challenging to grow in pots than some other vegetables, the benefits – such as portability and the ability to grow them even if you don’t have room for a traditional garden – make it well worth the effort. In this blog post, we’ll discuss five essential factors for growing healthy tomato plants in containers.
One factor to consider is the type of tomato plant you want to grow. There are determinate and indeterminate varieties, and each has its own benefits and challenges. Determinate tomato plants are smaller and require less pruning, while indeterminate tomato plants will continue to grow and produce fruit throughout the summer.
Also, you’ll need to choose the right size pot for your tomato plant. The general rule of thumb is that a tomato plant needs at least one gallon of soil for every foot of height. So, if you’re planning on growing a determinate tomato plant that will be about two feet tall, you’ll need at least a two-gallon pot.
It’s also important to make sure the pot has drainage holes in the bottom so the soil can drain properly. If the pot doesn’t have any drainage holes, you can drill some yourself.
How to Grow Tomatoes in Containers
1. Choose the right variety of tomato.
Determinate types (also known as bush, compact, or patio plants) are typically the finest tomatoes for containers since they reach a predetermined height – no taller than 3 to 4 feet – and blossom and fruit all at once, ensuring dependability and predictability in restricted areas.
However, if you give them a big enough container and good support for their vines, you may still achieve indeterminate tomatoes. (I’ll get to my favorite tomato supports in Step 9.)
If you live in a climate with a short growing season, late start in the season, or little space, determinate tomatoes are ideal.
The following are some of the best determinate tomato cultivars: Glacier, Red Siberian, Italian Roma, Supremo Roma, Cherry Falls
If you have a long season and adequate land for a large, tall plant, indeterminate tomatoes will provide you with continuous harvests throughout the summer and are fully manageable in pots!
Indeterminate tomato varieties that are recommended: Cherokee Purple, Green Zebra, Black Krim, Cuore Di Bue, Chocolate Cherry
2. Begin with a healthy and robust transplant.
Ideally, the tomato plants you start with should have been repotted at least once and properly hardened off.
Repotting helps your tomato plants develop thicker root clusters, which aids them to survive the trauma of transplanting, fight pests and diseases that target weakened young plants, and develop in general.
If you’re buying plants from a nursery or garden center, make sure they have thick, robust stems and healthy green foliage free of insect damage, sunburn, and yellowing (which indicates watering issues or nutritional deficiencies).
Finally, I avoid “top-heavy” plants with tall, thin stems since it might suggest that they haven’t received enough sunshine or been repotted.
3. If you’re uncertain about container size, go for it. Choose a fabric pot instead of a plastic one to avoid being embarrassed.
Tomatoes love big pots.
Indeterminate types should be grown in at least 20-gallon containers, while determinate varieties require at the very least 10-gallon containers. Smaller than these dimensions, your plants may not be as productive as they could be.
My favorite containers are fabric pots. They’re available in non-degradable or biodegradable varieties, but since I like to recycle my containers, I go with the non-degradable Boxer series so I can reuse them year after year.
Fabric pots benefit plants with substantial root systems because they naturally “air prune” the roots.
When comparing side by side plants in breathable fabric pots with those planted in non-porous plastic containers, the effects of air trimming are most apparent.
When the roots in plastic pots reach the pot’s edges, they continue to develop circular and round (spiraling, kinking, and twisting around themselves) until they become rootbound.
On the other hand, fabric pots expose roots to air as they develop. The tips of the roots are burned away because of this exposure, which prevents them from growing long and spindly. Instead, they branch out and generate new, shorter feeder roots.
The dense network of branched roots is able to increase the plant’s uptake of water, utilize all available nutrients, and aid in its natural defenses since growth is well dispersed throughout the soil volume (and not just on the edges of the pot).
Fabric pots’ permeability aids in the drainage of excess water and the oxygenation of the roots, which increases plant metabolism (and hence crop yields).
Black plastic pots, on the other hand, have a practical application in colder climes. They retain heat and keep roots warm in late spring to early summer when tomato transplants are most vulnerable to temperature changes.
On the other side, black plastic pots may get excessively hot in the height of summer, so they must be shaded to avoid the rootball from over-heating.
You may insulate plastic pots by wrapping or draping them in shade cloth, canvas, or towels (office binder clips are ideal for keeping them in place). You can also try to keep them away from heat-retaining surfaces like concrete.
Place a sturdy saucer underneath whatever container you’re using before loading it up and placing it where you want it – it’ll be really difficult to move later on.
The saucer will prevent water from standing on your deck or patio and allow your plant to absorb any extra moisture throughout the day.
4. Choose a potting soil that is high-quality.
Plants in pots require a suitable balance of ventilation, moisture absorption, and retention.
Because your garden soil (as well as any commercially bagged mix labeled as “raised bed dirt” or “garden soil”) is too thick for potted plants, it raises the danger of your tomato plant catching a disease transmitted by dirt.
If your plants had pests or diseases, I recommend using a high-quality premium potting soil or potting mix. If your plants had problems, you should avoid reusing potting soil from previous seasons. You can also create your own potting mix with only three ingredients.
Continue with Step 5 if the soil in the bottom of your container is about 3 to 4 inches thick. Spread an additional 3 to 4 inches of potting soil on the bottom of your container, then finish with Step 5.
5. Make sure your tomato plant is adequately fed.
Tomatoes require a lot of nutrients to grow properly and throughout the season.
Add the following amendments to the soil and stir them around a bit before putting the tomato transplant in its final planting hole:
- 1/2 cup of tomato/vegetable fertilizer (1 part) + 1/2 cup crushed eggshells (1 part)
- One pound of fish meal contains 1/4 cup.
- 14 ounces of liquid (1/4 cup)
- 2 aspirin tablets
After the changes have been made, add another 2 to 3 inches of potting soil on top.
6. Bury the tomato plant’s stem.
Remove the lowest sets of leaves, beginning with the bottom one-third to one-half of the stem, gently pinching or snipping them off until you have a bare stem at the bottom one-third to one-half of the stem.
Fill the rest of the pot with more potting soil until it’s full to the brim (just below the final leaves). To settle the dirt, gently move the container.
Top off the potting mix with 1/2 cup all-purpose fertilizer and lightly rake it around the stem base.
7. After pruning, keep the tree moist and irrigate it as needed.
Allow the soil to dry out somewhat before watering. Water the plant in, wait 10 minutes, water again, and wait 10 more minutes before repeating until water comes freely from the bottom of the container.
It takes a lot of water (at least a gallon, from my experience) to completely saturate the soil for the first time. Don’t assume that because the water drains immediately on the first watering that the dirt is fully soaked.
When it comes to tomato plants in pots, the most important factor is watering. Too little or excessive water can harm your plant’s development, causing blossom end rot or attracting pests when the weather is hot or your plants are stressed.
For the aforementioned reasons, water only the root zone with a watering can, garden hose, drip irrigation, or soaker hoses (not on the leaves) to allow you to monitor exactly how much water your plant is receiving each time.
Depending on the weather, you may or may not need to water again until three days later after the initial watering. If your finger slips into the top 3 to 4 inches of dirt and it feels dry, give it a drink.
If you live in a hot, dry climate, check the soil on a daily basis throughout the summer to be sure there is adequate moisture.
Because plants in containers dry out more quickly than those in raised beds or in-ground garden beds, you may need to water at least once every other day as temperatures rise. The more compact the container, the more frequently it will require watering.
Water the soil deeply and often, as tomato plants like it. Make sure to saturate the dirt until all of the water has drained out from the bottom. Only give another lengthy soak if the top 3 to 4 inches of soil are dry.
8. “Walls of Water” protect young transplants from freezing.
Tomatoes may be planted outdoors at any time of year if the nighttime temperatures are consistently above 45°F.
In areas with short or fickle growing seasons, it’s sometimes best to bring them outside as soon as possible (or you could never know when temperatures might fall below freezing).
With “walls of water” (also known as tomato teepees), I keep my transplants safe throughout the late spring to early summer period. They’re a wonderful way to keep plants warm and dormant, as well as being quite simple to utilize (there’s no requirement to take frost covers on and off each day).
Water walls allow you to plant your tomatoes up to six weeks before the first freeze and keep them alive for up to six weeks after it, as long as temperatures don’t drop below 16°F. (They haven’t let me down yet, though I’ve never used one below 28°F.)
They also protect against the elements, making them ideal for young plants that have yet to firmly establish themselves in the ground.
“Walls of water” is a ring of heavy-duty plastic that has been split into long tubes. Water is pumped into the tubes, and the “walls” are placed over the plant with the weight of the tubes keeping them in place. Around your plant, you’ll get what appears to be a teepee.
(Pro tip: Fill the tubes halfway with water and place the walls of water over a bucket, allowing them to stand mostly on their own. Continue filling the tubes with water until they are totally submerged in your container.)
Walls of water act as tiny greenhouses, collecting heat from the sun during the day and radiating it back out at night.
Because they require water to function, you should refill them at least once a month in dry conditions. In colder areas, though, they’re surprisingly efficient and I highly recommend using them if you want to get an early start on the growing season.
I usually take it down before my tomato plants are a few inches above the walls (or I’m sure there’s no problem with frost once again).
To remove the tomato teepee, push all of the walls in until water spills out the top and onto the ground.
After the tubes have been largely emptied, you can roll them down, raise them up over the plant, dry them out, and store them for next year. Then go on to Step 9.
9. Add your support structure.
Add your tomato support at this stage before the plant grows too big to reduce the risk of damaging its roots. If you’re growing determinate tomatoes, metal conical cages that come with most garden centers will be enough. However, because I believe they are too flimsy to support the long, sprawling vines in indeterminate tomatoes, I am generally not a supporter of them for determinate tomatoes.
(Pro tip: If you use tomato ladders, you can stake your plants first and then add the “walls of water” over them, making things a little more organized.) They’ve supported my container tomatoes that grew to be over seven feet tall and are easy to store away at the end of the season.
The cages, on the other hand, seem to be a little more effective in restraining the vines than the ladders since you can simply tuck your tomato branches back into the cage if they get out of control. You have to keep an eye on tying or trimming the vines to the stakes to avoid them becoming messy and disorganized with tomato ladders. Don’t wait until you need it to put it up; that will just make it more difficult to manage a mature tomato plant into a cage rather than having it there from the start.
10. Mulch the soil.
Mulching is critical for any garden, but it’s especially crucial for container gardens since it helps to keep the soil wet. Cover the dirt with organic mulch such as straw (not hay, which has seeds), shredded bark, or arborist wood chips at least 2 inches thick.
Mulch should be placed on top of a thick layer in the early spring and tilled into the soil throughout the summer to prevent weeds from sprouting. Compost it with your spent tomato plants at the conclusion of the season.
11. Tomatoes require consistent fertilization throughout the year.
Your tomato plants will require another dose of nutrients approximately six weeks into the season, even though you gave them all that great stuff in the planting hole.
Follow the manufacturer’s instructions for applying the fertilizer. Place your fertilizer bag or bottle nearby so you’ll never forget to feed them.
Tomatoes grown in pots require a lot of work and are usually associated with low-quality produce. Try to stay away from high-nitrogen fertilizers since you’ll end up with a lot of lush green leaves but no flowers or fruit. I adore growing tomatoes in all sorts of weather, so if you have any concerns about planting tomatoes in pots, please feel free to ask!
How to Grow Tomatoes in Pots Like a Gardening Pro
Tomatoes may be grown in a small space. All you need is this step-by-step instruction that explains which cultivars to cultivate and how to prepare your crops for success.
PREP TIME
10 minutes
ACTIVE TIME
35 minutes
TOTAL TIME
45 minutes
DIFFICULTY
Easy
Required Materials
- Start with a tomato seedling or transplant.
- 10- to 20-gallon container
- 25-inch heavy-duty saucer
- 1.5 to 3 cubic feet of high-quality potting soil (depending on container size)
- 1 tablespoon of liquid fertilizer and 1/2 cup of tomato/vegetable fertilizer
- 1/4 cup of fish meal
- 1/4 cup of bone meal
- 2 aspirin tablets
- Handful of crushed eggshells
- 1/2 cup of all-purpose fertilizer
- 1 Walls of Water tomato teepee (optional)
- 1 tomato support structure
- Organic mulch
Suggested Tools
- Trowel
- Garden snips or scissors
- Cultivator
Instructions
- Choose the ideal sort of tomato. What type of plant are you growing? Are you growing determinate plants, which produce fruits right away, or indeterminate plants, which require a longer period to grow and fruit? The length of your space and the season in which it is suitable for planting will help you choose.
- Begin with a healthy and robust transplant. Typically, the reason your tomato transplant isn’t growing is that it hasn’t been repotted and hardened off properly before.
- Don’t be afraid to use big containers, and pick a fabric pot over a plastic one. For determinate tomatoes, you’ll need a 10-gallon container and for indeterminate tomatoes, you’ll need a 20-gallon container. To ensure that it’s in the location you want it, place a saucer on top of the container before filling it up – otherwise, when you move it later, it’ll be extremely difficult to carry.
- Use high-quality potting soil. Place a few inches of high-quality potting soil on the bottom of the container.
- Feed your tomato plant with care. To prepare your container, add the following amendments to the soil: tomato/vegetable fertilizer, fish meal, bone meal, aspirin, crushed eggshells. Then top with another 2 to 3 inches of potting soil.
- Bury the stem of the tomato plant. Squeeze or snip the lowest sets of leaves off, leaving a bare stem on the bottom one-third to one-half of the stem. Fill the rest of the container with more potting soil until it’s full (just below the final set of leaves). Gently shake the container to settle the dirt and add more as required. 1/2 cup all-purpose fertilizer topped with a bit of raking
- Water thoroughly and consistently. Water the root zone completely until the earth is all-over moist. Water in, wait 10 minutes, water again, wait 10 minutes once more and then repeat as needed until water comes freely out of the bottom of the pot. It will take up to 1 gallon of water to fully saturate the soil.
- Using “walls of water” to protect young transplants from frost is a simple solution for preserving them. This is a good idea in cold regions, but it’s not required. Fill a Wall of Water and set it over your seedling to protect against frost if nighttime temperatures are frequently below 45°F at the time of planting. When your tomato plant is approximately 3 inches above the walls (or all danger of frost has passed), remove the Wall of Water.
- Place your support structure. To safeguard the roots, apply your tomato support to the plant before it grows too big.
- Mulch the soil. Cover the soil with at least 2 inches of organic mulch such as straw (not hay, which has seeds), shredded bark, or arborist wood chips to avoid compaction.
- Fertilize your tomatoes once a week during the growing season. Feed your tomato plant every six weeks throughout the season, using a balanced organic fertilizer according to the package instructions.
Summary
Tomatoes can be a challenging vegetable to grow in containers; however, there are several things you can do to increase your chances of success. Amend the soil with tomato/vegetable fertilizer, fish meal, bone meal, and aspirin tablets before planting. Use a high-quality potting mix and water thoroughly and consistently. Finally, fertilize your tomato plant once a week using an organic fertilizer. With these steps, you’re sure to enjoy homegrown tomatoes this summer!