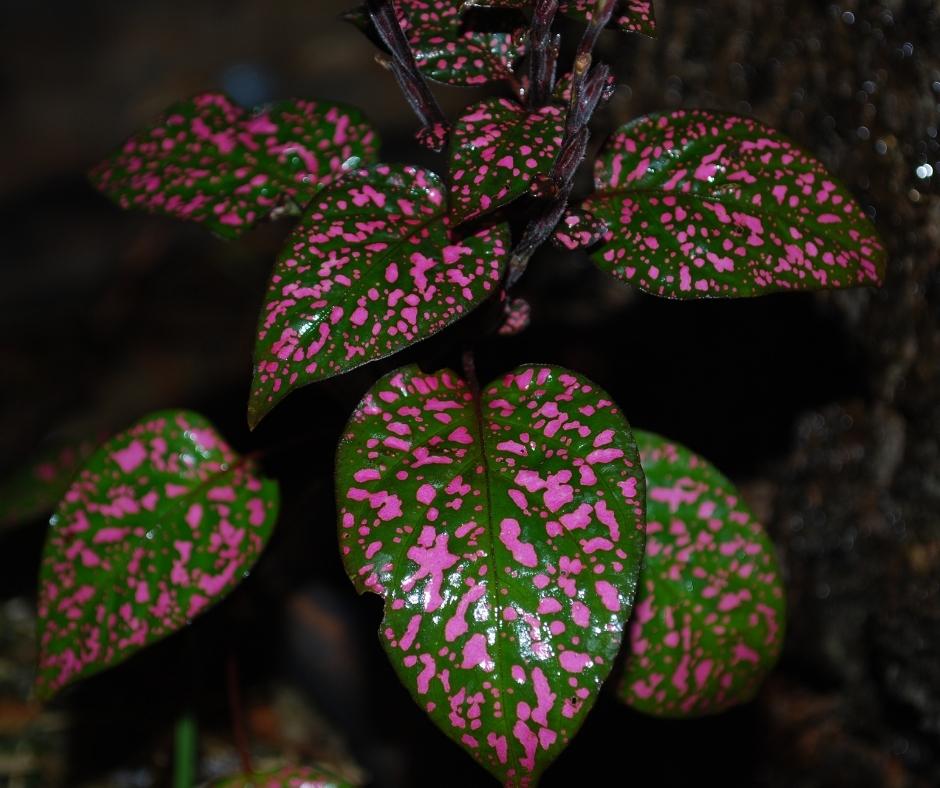
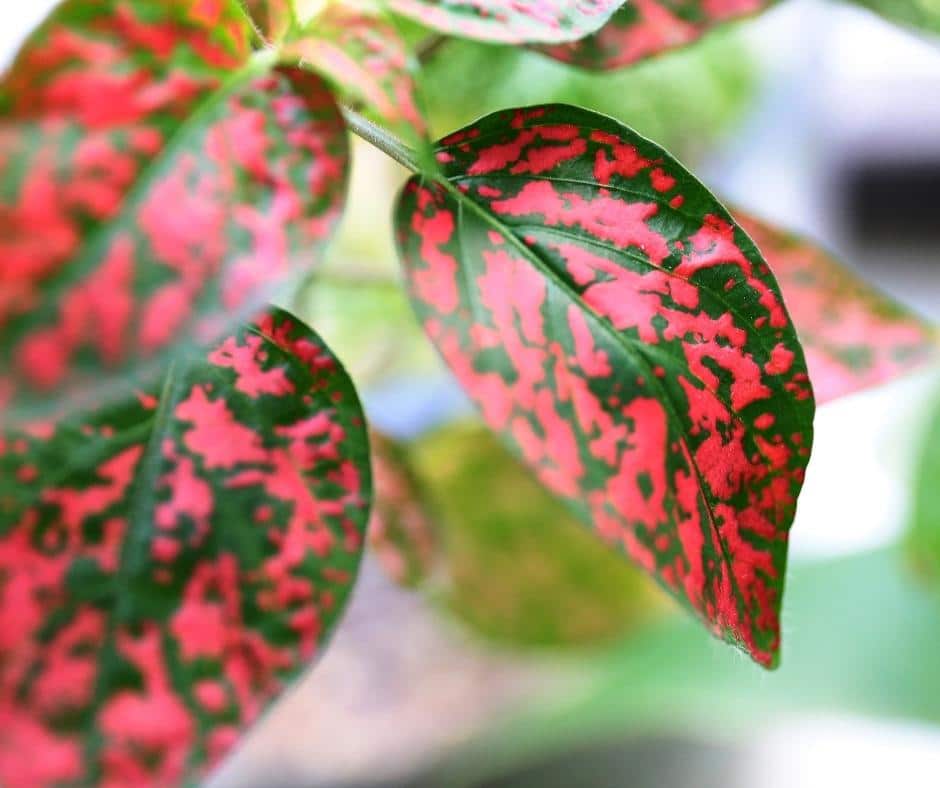
The Polka Dot Plant (Hypoestes phyllostachya) is one of the most colorful and distinctive houseplants available. They come in a range of hues, including pink, white, and even red, and are simply known because of their amazing dotty leaves!
Polka Dot Plants are simple to maintain but also very easy to grow from seed. This article will walk you through all you need to know about propagating your Polka Dot Plant, including a step-by-step method for beginners, as well as the tools needed and how to detect and fix problems that may arise.
General Information
Scientific name: Hypoestes phyllostachya
Pronunciation: hye-PESS-teez fil-loe-STACK-ee-uh
Common name(s): Polka-Dot Plant
Family: Acanthaceae
Plant type: ground cover
USDA hardiness zones: 10B through 11 (Fig. 2)
Planting month for zone 10 and 11: year round
Origin: not native to North America
Uses: mass planting; ground cover; border; edging; cascading
down a wall
Availablity: somewhat available, may have to go out of the
region to find the plant
Why propagate a Polka Dot Plant?
Why should you propagate a Polka Dot Plant, and why is it advantageous? There are a number of reasons:
- Create more Polka Dot Plants for absolutely no cost!
- The easiest, most affordable way to grow your Polka Dot Plant collection is to propagate it yourself! They’re also great presents for friends and family if you have enough houseplants.
- Save a Polka Dot Plant that is on its deathbed.
- If you overwatered (which is simple to do), fertilized or treated your Polka Dot Plants incorrectly, and it has begun to die, the best approach to preserve it may be to take the healthy stems and propagation them into new thriving plants before it’s too late.
- Make your Polka Dot Plants fit in with their surroundings.
Plants in the Polka Dot family are especially fast growers, and they can quickly outgrow their container or location in your house. Trimming portions of their development is a great method to reduce growth and propagating Polka Dot plant stems is an excellent approach to prevent them from going to waste.
What tools will I need to propagate my Polka Dot Plant?
What do you need to grow a Polka Dot Plant from seed?
Before taking any stem cutting, it’s crucial to make sure you have everything you’ll need. Let’s get this party started by talking about what you’ll need to propagate a Polka Dot Plant:
- Healthy and mature Polka Dot Plant (Hypoestes phyllostachya)
- Scissors/shears that are clean and sharp
- Spare pots with and without drainage holes
- Both fresh soil and water are required
- If you’re growing indoors, use a newspaper or plastic sheet
- Rooting hormone (optional)
- Gardening gloves (optional)
How to Propagate a Polka Dot Plant Using Stem Cuttings
This is the most popular way to grow Polka Dot Plants, as it works with all maturity levels. It’s also quite simple to do since you can simply take a few small cuts and create numerous new Polka Dot Plants.
Step 1
- Find healthy Polka Dot stems
- When taking a vine cutting, you want to make sure the plant part you’re going to cut is healthy enough to produce viable cuttings. Because they will be carried over to your new cuts and might cause them to fail, avoid any indications of illness or pests.
- One of the first things you’ll notice when pruning your Polka Dot Plant is a node. Without it, you won’t have a lot of luck with propagation. A node is where a leaf has sprouted from the stem.
Step 2
- Make a clean cut.
- Remove one or more stems using your clean scissors. You should aim for at least 2-3 leaves on the cutting to ensure you have a decent number of nodes from which roots may develop.
- Keeping your equipment clean not only prevents transferring germs or pests to your plants, but it’s also essential when working with hazardous plants. (Although Polka Dot Plants are non-toxic, it’s a good idea to develop this habit)
Step 3
- Fill a transparent container with water.
- You may now grow your cuttings in something. They can be planted straight into the ground, but we always recommend supplying them with water as a middle step. It has a higher success rate.
- Fill your container with lukewarm water and add your cuttings so that the lowest third is submerged. Covering more of the cutting increases the chance it will perish. Remove any leaves that will be in touch with the water at this time since they will begin to rot after being immersed for a few days.
- When propagating in a clear container, we always opt for one since you can see everything more clearly.
Step 4
- Place your cuttings in a spot that gets plenty of bright indirect light.
- Place your glass in direct, but not too strong, sunshine. Excessive light will harm the cutting and prevent a successful multiplication. You may use an LED grow light to see if your cuttings are receiving enough direct sunlight. You may also boost lighting levels by using an LED grow light, which is excellent for encouraging growth in cuttings. This one is fantastic and can be found on Amazon here
- If the cutting is larger than 1 inch, you will need to use rooting hormones. The new cuttings should be root-pruned at this stage. We’ve always found that rooting gel works effectively; you may get it on Amazon here.
Step 5
- Replace the water every few days.
- The most crucial stage in the Polka Dot Plant propagation technique is to keep the water clean (every 2-3 days is ideal). This prevents germs from accumulating, which is dangerous for your cutting. Stagnant water will also begin to stink, so it’s best to avoid this!
Step 6
- Be patient; it may take some time to see results.
- After a couple of weeks, your Polka Dot Plant cuttings should grow roots. After only a few days, two tiny roots should emerge from the node. However, it’s somewhat random, and some cutting may develop faster than others. But whereas other common houseplants might take months to produce anything happen, the process with Polka Dot Plant cuttings is considerably quicker.
- The advantage of Polka Dot Plants’ rapid root development is that there is less time for something to go wrong, and the danger of root rot is significantly reduced.
Step 7
- Place your Polka Dot cuttings in new potting soil.
- It’s time to plant your Polka Dot cuttings when the roots are a few centimeters long. If you’re new to growing plants, don’t worry if the roots are still fragile; this is typical for Polka Dot plants, so be cautious when potting them to avoid breaking them.
- We recommend using a high-quality potting mix to ensure that your cuttings get the correct combination of nutrients. Miracle Gro’s finest soil option is this potting mix. Place your cutting about a few centimeters into the soil and pop it back into the mother plant; it’s up to you!
Step 8
- Follow the basic Polka Dot Plant care instructions
After you’ve filled up your pots with soil and carefully placed your cuttings, you may resume your regular Polka Dot Plant care regimen, and your plants will grow to be large enough to reproduce again, resulting in way more Polka Dot Plants than you could ever want…
Propagate a Polka Dot Plant through division of the mother plant
This technique of reproduction works best if your Polka Dot Plant is fairly bushy, otherwise, they may appear sparse. This method is fantastic for people who don’t want to wait for new roots and leaves to develop – instead, they will sprout plants right away!
Step 1
- Remove the Polka Dot Plant from its container.
- The division method for growing your Polka Dot Plant necessitates detaching different offshoots/stems. This is considerably easier with Polka Dot Plants when compared to other plants since they readily split apart.
- The first stage is to carefully remove your plant from its container. Gently shimmy the plant out of the pot rather than tugging too hard on the leaves because they are extremely fragile.
Step 2
- Separate out the plant
- You’ll probably have to trim a few roots in order to untangle the plant, but you should be able to separate the various parts of the plant. Each portion should include some roots, so make a careful examination of them for any obvious issues (mushy rotten roots are one thing you’re looking for).
- It’s all about you and your mother plant when it comes to the number of new plants you wish to produce. When separating components of the plant, use shears rather than pulling them apart because this can easily damage it!
Step 3
- Place the new plant in fresh potting soil.
- Pop your mother Polka Dot Plant out of its container and back into its original pot (or downsize if you’ve removed a substantial amount of the original plant). Then, using fresh potting mix, pot your new plant(s). Miracle Gro’s is one of our favorite potting mixes.
- You don’t want to reuse old potting mix from other plants since there may still be germs or pests in it that will harm your new plants.
Step 4
- Continue normal Polka Dot Plant care
- That concludes Polka Dot Plants’ division propagation method. Continue with your usual Polka Dot Plant care now that they’ve been transplanted to their new homes!
Polka Dot Plant Propagation FAQs
How long do polka dot plant roots take to mature?
Polka Dot Plants are considered relatively quick growers – they can root in about 14 weeks. This is, of course, provided that the soil conditions are suitable for rooting and provide nutrients.
What polka dot plant propagation methods work best?
The water method polka dot plant propagation approach works well with polka dot plants because it ensures the developing roots have an ample amount of oxygen inside the glass jar. If you want to propagate your polka dot plant in a more expedient manner, however…the division method is your best bet! It’s much easier than waiting for new leaves and roots to sprout when propagating through seeds.
When should I repot my polka dot plant?
Whenever you feel your polka dot plant has outgrown its current pot, it’s time for a repotting session! Just make sure the soil is appropriate for the size of the polka dot plant you have.
How much water should polka dot plants receive?
Polka dot plants do best when each portion sees one to two inches of water per week, but that doesn’t mean all at once. You can spread this evenly across several doses throughout the week if necessary, although too many baths could cause rotting! As with most houseplants, avoid watering polka dot plants from above so they don’t experience root rot.
What are the common causes of polka dot plant failure?
Unfortunately, there are several polka dot plant problems that can result in failure when attempting polka dot plant root development. This includes the presence of insects or diseases, so keep an eye out for pests.
How can I revive polka dot plant leaves?
The polka dot plant leaves may brown up if your polka dot plant dries out too much. Resume watering and then reduce amounts after a few days to prevent over-watering. The light also plays a role in polka dot plant health – too little will make them turn yellow; too much could burn their leaves! No matter what happens, never give up on your polka dot plants because they’ll almost always recover within two weeks (sometimes less).